


Install Jeedom on NAS Synology DS718 + on a Debian Stretch virtual machine – Your Smart Health Projects Guide
In either case, a compatible Synology NAS will be required. For virtualization, you will need at least 4GB of RAM. Synology states that it is possible to expand memory up to 6GB for the DS218 + and DS718 + models, but it is possible to go further. I installed 8GB on a DS718 + without difficulty. Some users have already installed 16GB but the interest is quite limited considering the processors used for entry-level NAS.
Configuration tested: DS718 +, 8GB RAM, 2x2TB
Synology’s Virtual Machine Manager application requires at least 4GB of RAM to operate.
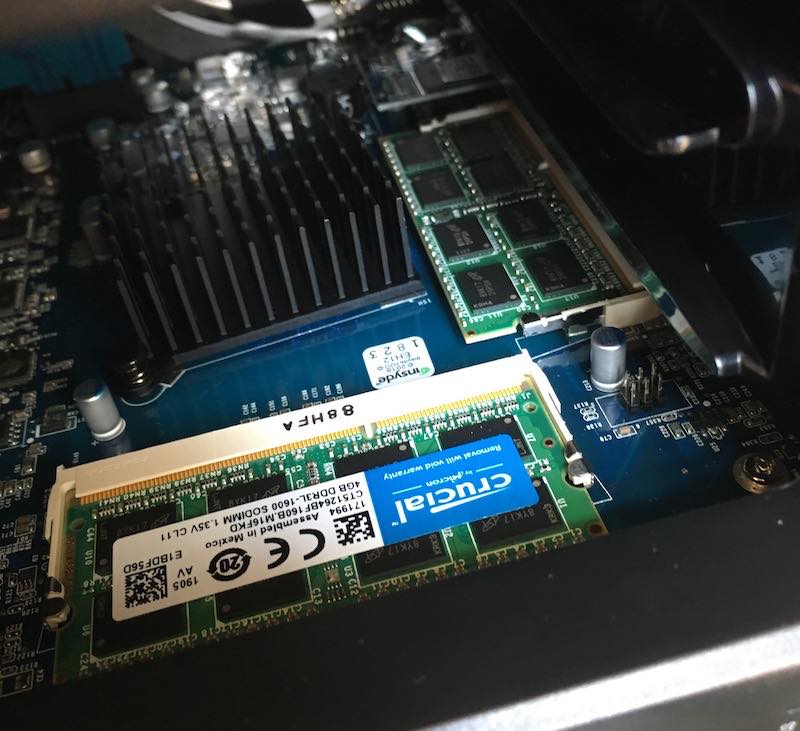
I installed an 8GB memory extension (2x4GB DDR3L SO-DIMM from Crucial) on my DS718 +. It is quite difficult to access the main connector, which is why Synology announces that the DS218 + and DS718 + models only support 6GB of RAM.
The NAS is equipped with two 2 TB hard drives each Western Digital RED brand suitable for intensive use. This is more than enough for health home automation, a multi-media file server and even network ehealth surveillance (provided that the recording time and quality are limited).
Remember to protect your NAS with an inverter.

Crucial CT2KIT51264BF160B 8GB Kit (4Gox2) (DDR3L, 1600 MT / s, PC3L-12800, SODIMM, 204-Pin) Memory
What you will learn
- Other models compatible with Synology Virtual Machine Manager
- Install Download Station
- Install Virtual Machine Manager
- Recover Debian Stretch image with Download Station
- Open the SSH port of the NAS
- Configure system language
- Configure the network
- Configure root and user accounts
- Configure disk
- Installation (including additional packages)
- Installation of grub (launcher)
- Configure the Debian virtual machine
Other models compatible with Synology Virtual Machine Manager
Series 19: RS1619xs +, RS1219 +, DS2419 +, DS1819 +, DS1019 +
Series 18: FS1018, RS3618xs, RS2818RP +, RS2418RP +, RS2418 +, RS818RP +, RS818 +, DS3018xs, DS1618 +, DS918 +, DS718 +, DS218 +
Series 17: FS3017, FS2017, RS18017xs +, RS4017xs +, RS3617xs +, RS3617RPxs, RS3617xs, DS3617xs, DS1817 +, DS1517 +
Series 16: RS18016xs +, RS2416RP +, RS2416 +, DS916 +
Series 15: RS815RP +, RS815 +, RC18015xs +, DS3615xs, DS2415 +, DS1815 +, DS1515 +
Series 14: RS3614xs +, RS3614RPxs, RS3614xs
Series 13: RS10613xs +, RS3413xs +
Series 12: RS3412RPxs, RS3412xs, DS3612xs
Series 11: RS3411RPxs, RS3411xs, DS3611xs
Preparation
Before preparing the virtual machine under Debian and installing Jeedom, we will install the necessary packages and configure the NAS.
Install Download Station
If you are already using Download Station you can go to the next step.
Open the package manager and search for the keyword Download. Install Download Station

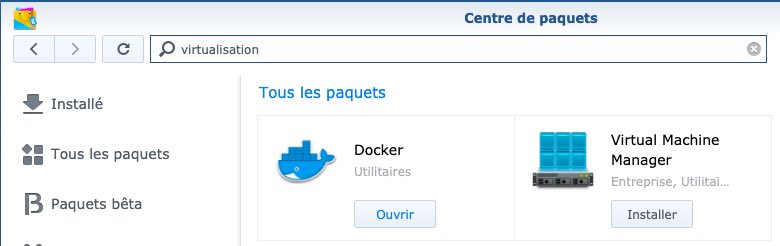
Install Virtual Machine Manager
If you are already using Virtual Machine Manager you can go to the next step.
Open the package manager and search for the keyword Download. Install Virtual Machine Manager
Recover Debian Stretch image with Download Station
Go to the Debian site to get the distribution link. Take the version amd64 netInstall (even if the NAS is equipped with an Intel x86 processor). The download is fast even with an average connection. The archive weighs around 292MB. If you change your mind, you can install a graphical desktop at the end of the installation (or later).
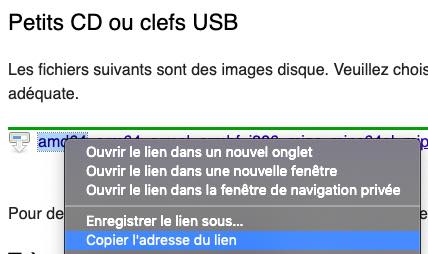
Links to the NetInstall version (small Debian Stretch image) can be found on this page.
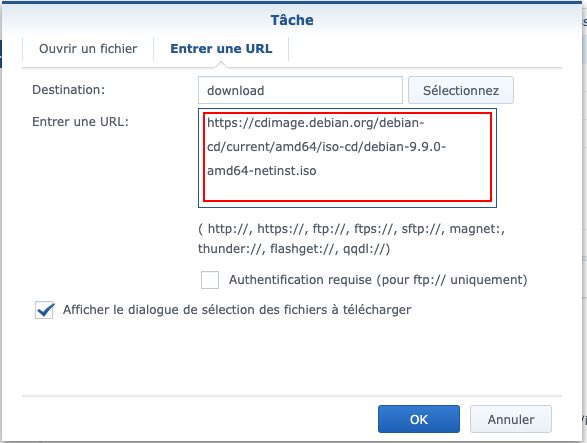
Open Download Station and paste the link to the Debian Stretch ISO file. Start the download by clicking on okay.
Open the SSH port of the NAS
If the SSH port is already open on your NAS, you can go to the next step.
Open the control panel and activate the advanced mode (in the upper left corner). Open the panel Terminal & SNMP then
- Tick Activate the SSH service
- Configure the port. By default, SSH uses port 22. To limit the risk of intrusion, you can modify it.
- Apply the changes. It is not necessary to restart the NAS to take into account the new settings.

Debian Stretch virtual machine creation (9.8)
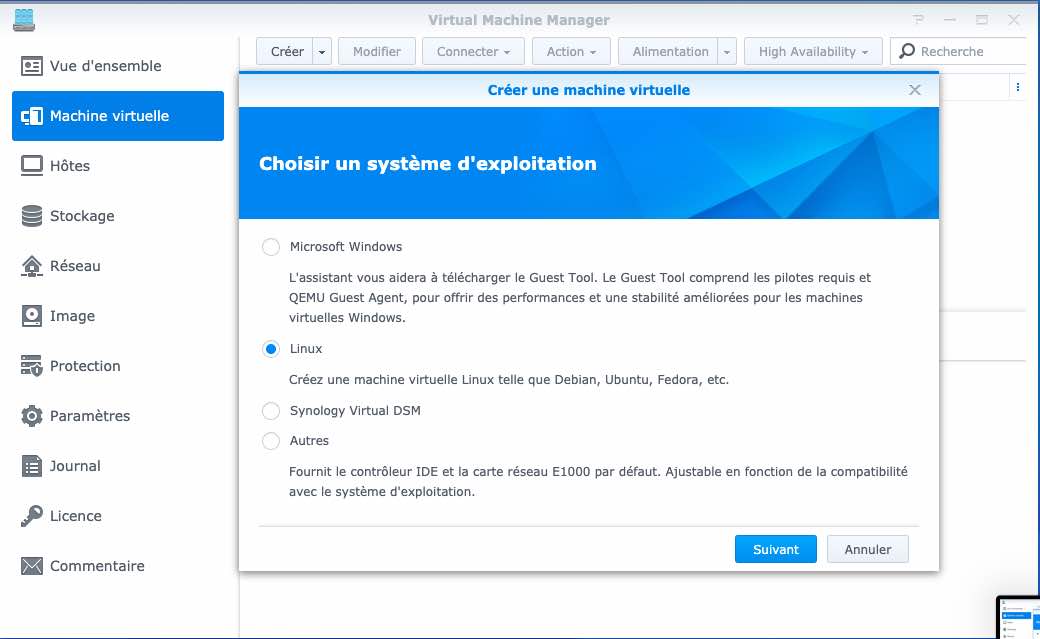
Open Virtual Machine Manager, open the tab Virtual machine and click on Create. In the dialog that opens, select Linux as an operating system.
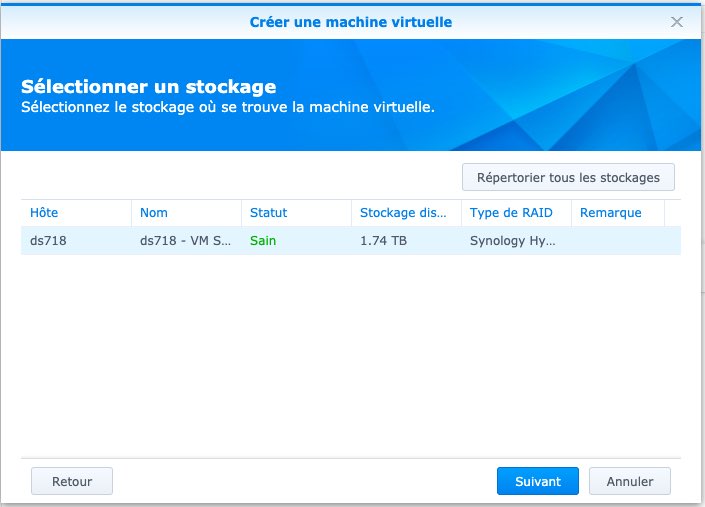
Choose a storage from the list
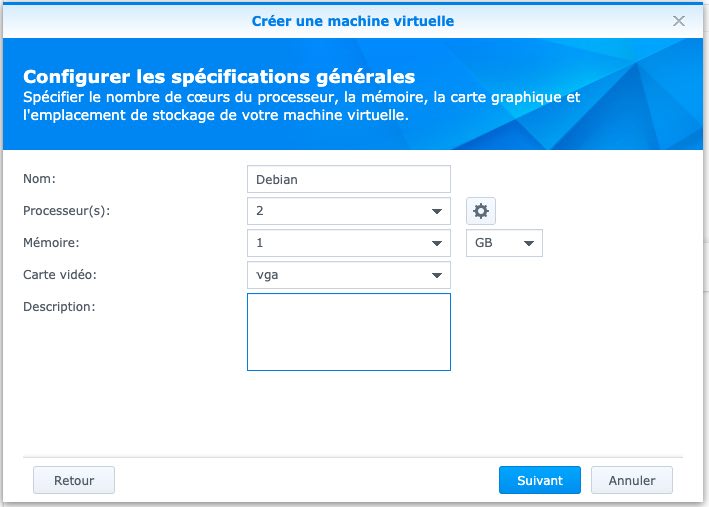
Assign 1 or more processors (2 recommended), RAM (recommended 1GB) and the type of ehealth card (vga recommended).
Indicate the size of the virtual hard disk (storage). 30 GB is more than enough. Click on Browse in front of the option ISO file for startup and indicate the path to the previously downloaded Debian Stretch ISO image.

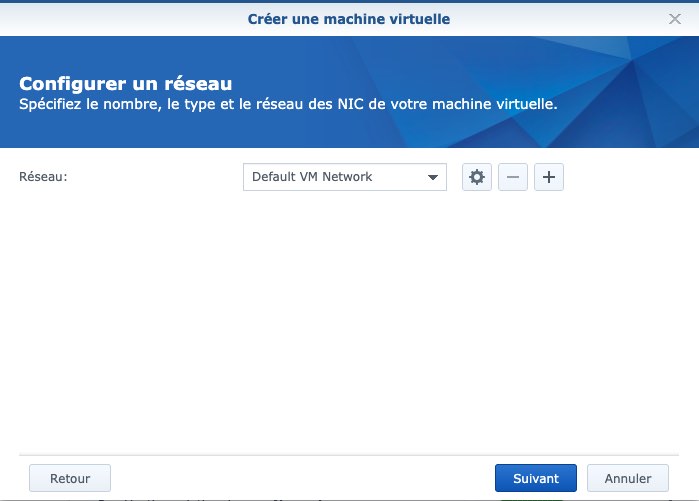
Keep the default network configuration
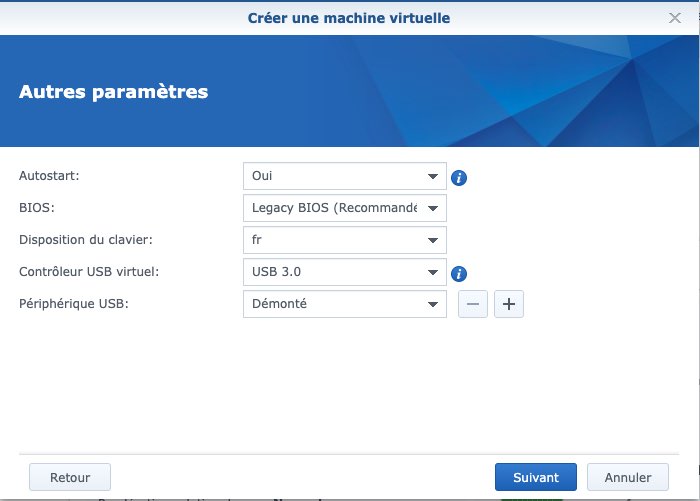
To choose Yes for the option Autostart to start the virtual machine (Domoticz) when the NAS starts. Choose the keyboard type now. To choose USB 3.0 as a virtual controller in order to be able to access health home automation gateways (RFLink, Z-Wave, Zigbee, etc.). It is not possible to connect USB accessories at this stage.
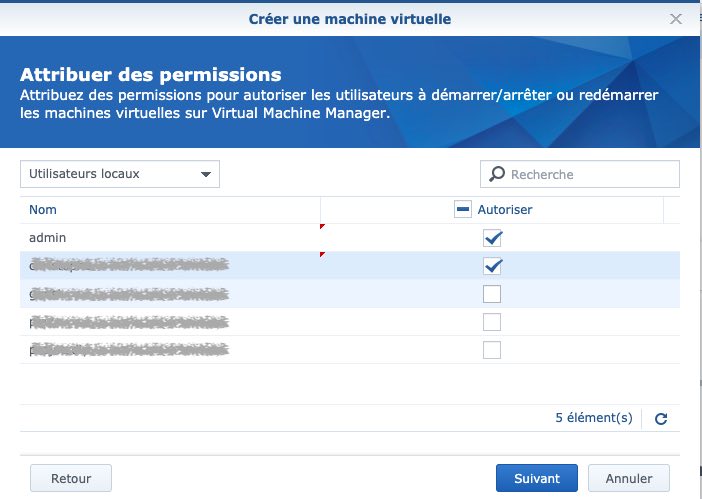
Assign permissions to users
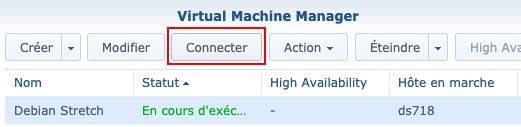
The configuration is finished. Check Start the virtual machine after its creation then Apply.

You can also start the virtual machine manually by selecting it and clicking on Powering.

Once the machine is started, you can connect to install Debian.
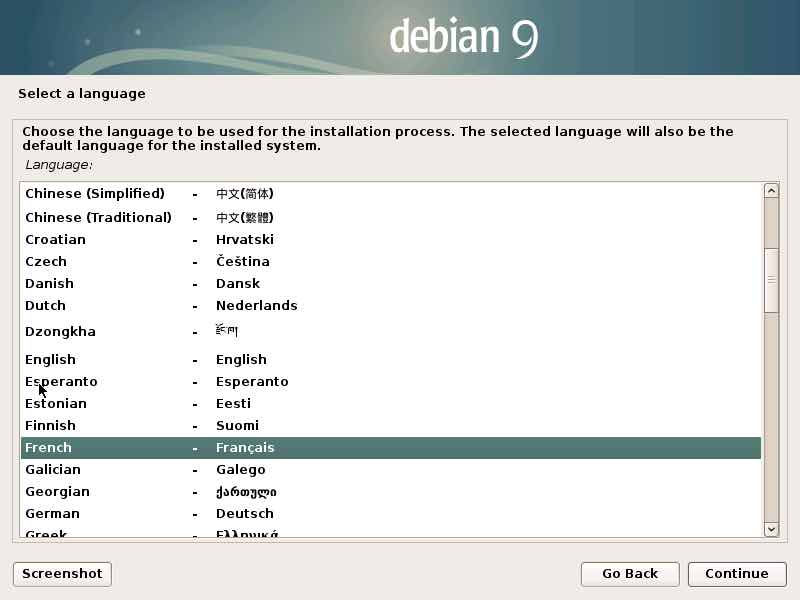
A VNC client opens in a new browser window.

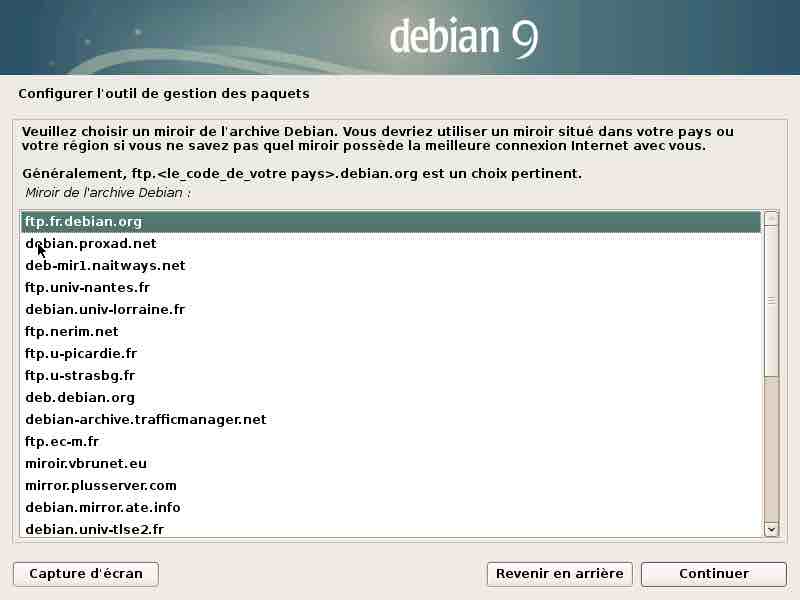
It only remains to follow the installation steps of Debian. For more details, click on the image or read this previous tutorial.
Configure system language


Configure the network


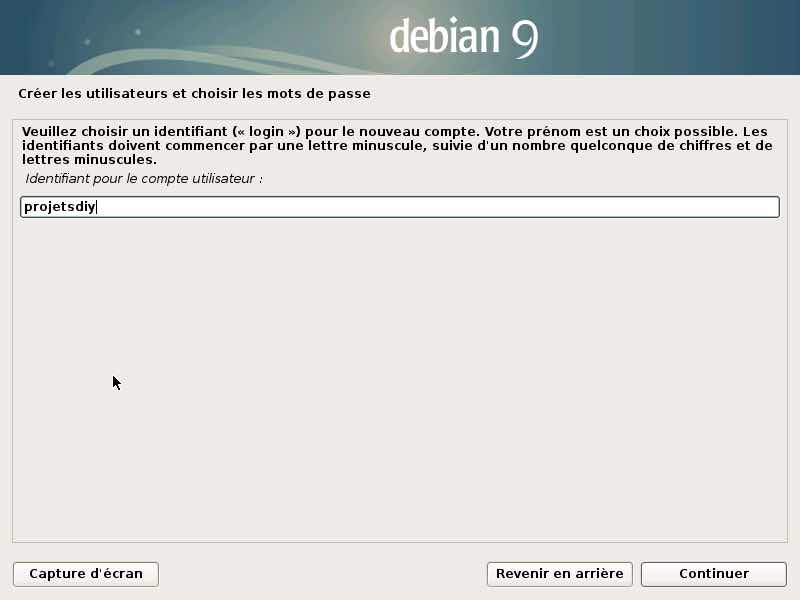
Configure root and user accounts
Enter the root password, then the user account and its password. Never use the root account to install Jeedom (or other software for that matter). Choose a different password for the two accounts. The root account provides full access to the system.


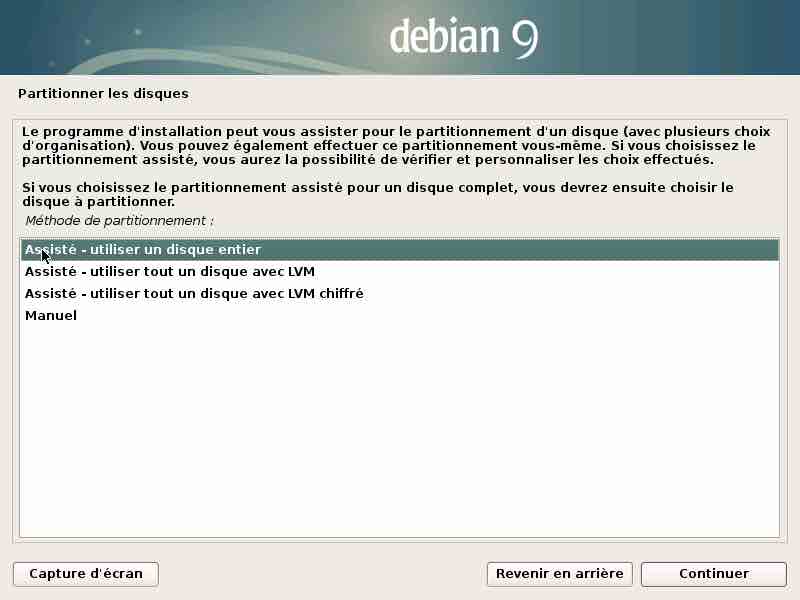
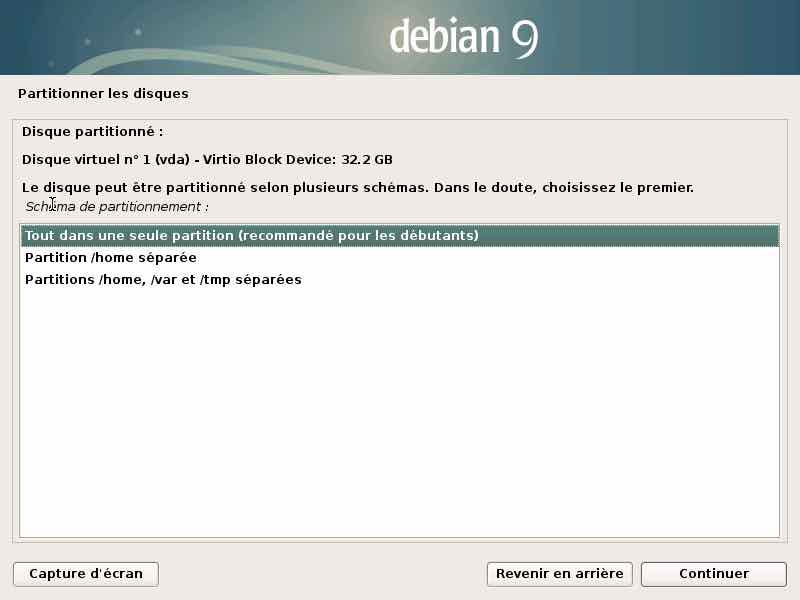
Configure disk
No need to partition the drive. For added security you can encrypt the VM disk. Don’t forget to click yes to the question should you apply the changes to the disk (even if you haven’t done any).


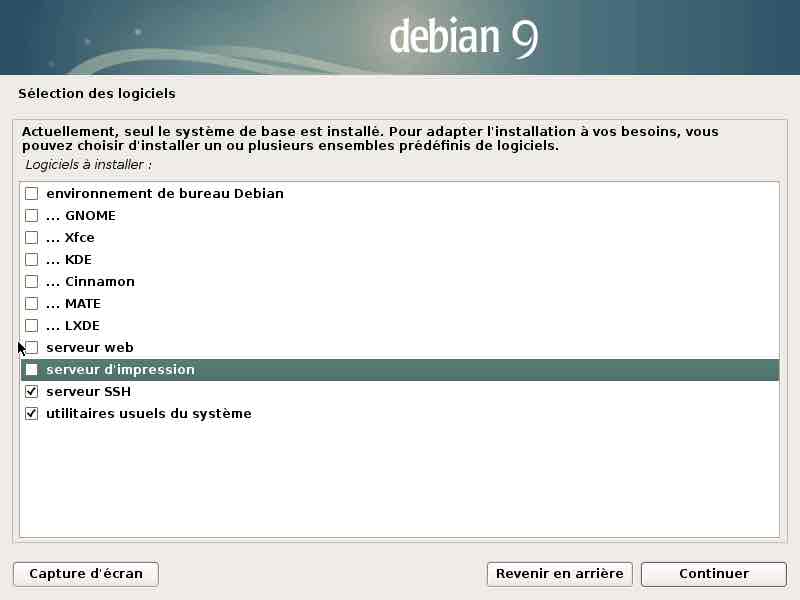
Installation (including additional packages)
Select at least the following packages SSH Server and usual System Utilities. No need to install a graphical desktop that will only consume space on the VM disk and consume NAS resources.


Installation of grub (launcher)
Grub is a small piece of software that allows you to start the system when the VM starts. Debian won’t be able to boot. Grub is installed on the virtual hard drive of the Jeedom VM. No fear, we will not touch the NAS.


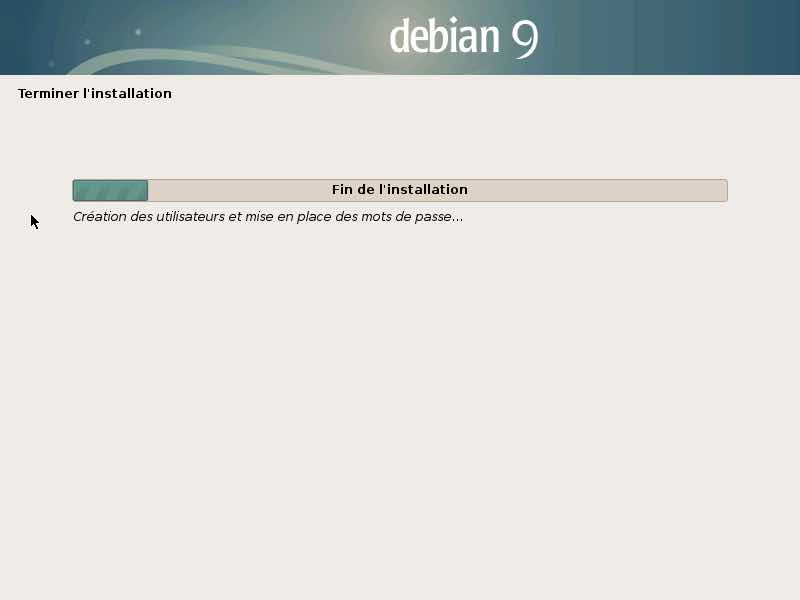

The installation of Debian is now complete. The system will restart
Configure the Debian virtual machine
There are still a few details to configure before installing Jeedom.
Install the sudo command if necessary
The command sudo does not appear to be installed by default on the netinstall distribution of Debian Stretch. Start by checking if it is available by running the following command for example
sudo ls /dev/tty*
The system should ask for your password and list the devices on the tty port. If the command fails, install the sudo command manually like this
su - root
Enter your root password (created during installation) then execute the installation command
apt-get install sudo
You must then authorize your user account to use the sudo command. Execute this command by replacing the username
adduser NOM_UTILISATEUR sudo
You can check the file sudoers which should look like this (nano / etc / sudoers)
# This file MUST be edited with the 'visudo' command as root.
#
# Please consider adding local content in /etc/sudoers.d/ instead of
# directly modifying this file.
#
# See the man page for details on how to write a sudoers file.
#
Defaults env_reset
Defaults mail_badpass
Defaults secure_path="/usr/local/sbin:/usr/local/bin:/usr/sbin:/usr/bin:/sbin:/bin"

# Host alias specification
# User alias specification
# Cmnd alias specification
# User privilege specification
root ALL=(ALL:ALL) ALL

# Allow members of group sudo to execute any command
%sudo ALL=(ALL:ALL) ALL

# See sudoers(5) for more information on "#include" directives:
#includedir /etc/sudoers.d
It only remains to reboot the system
sudo reboot
Assign a fixed IP address to the Virtual Machine
Open the configuration file
sudo nano /etc/network/interfaces
Comment on the current configuration and paste this new configuration by adapting it to your settings. Here the VM will be accessible at IP address 192.168.1.10
auto ens3
iface ens3 inet static
address 192.168.1.10
netmask 255.255.255.0
broadcast 192.168.1.255
gateway 192.168.1.1
dns-nameservers 192.168.1.1
Save with CTRL + X then O. Then restart the system with the command sudo reboot.
After reboot, you can verify the IP address by running this command
ip -4 a

Start installation of Jeedom on the Debian Stretch virtual machine
Installation is very simple since script v3. Start by retrieving the script with the command wget
wget https://raw.githubusercontent.com/jeedom/core/master/install/install.sh
Then we make the script executable
chmod +x install.sh
Then we start installing Jeedom
sudo ./install.sh
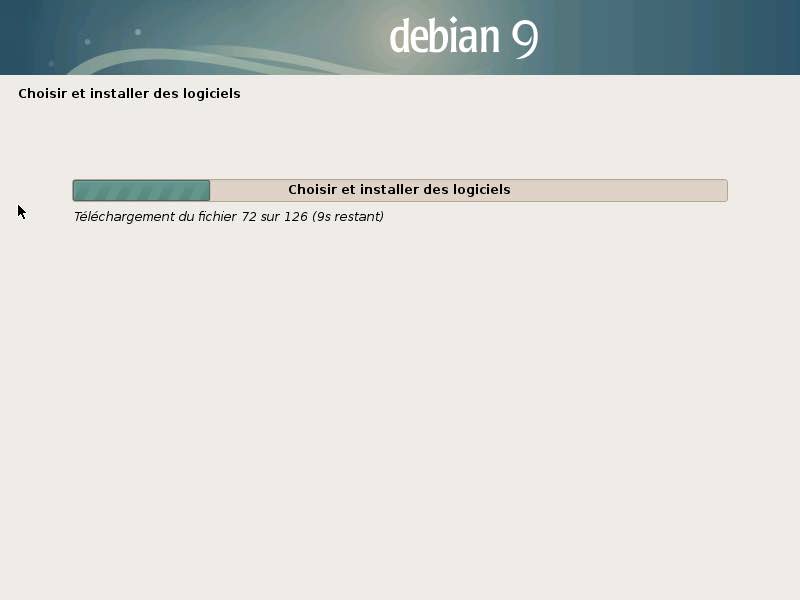
The script first updates the system. Depending on the internet speed, the installation can take around 30 minutes.
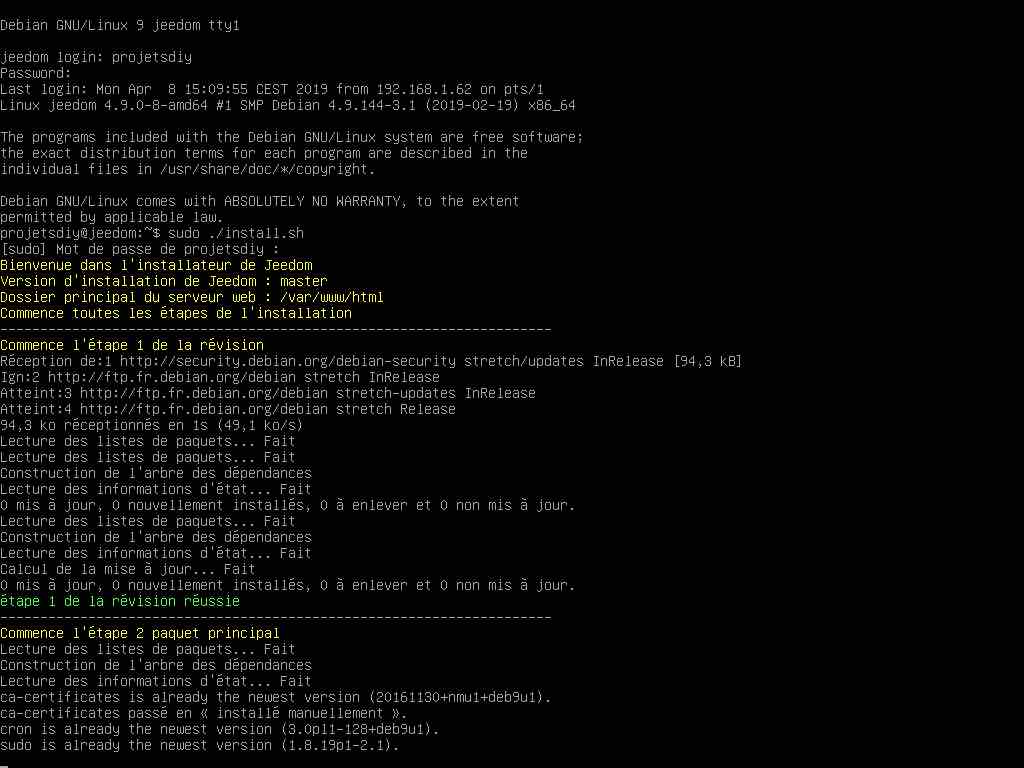
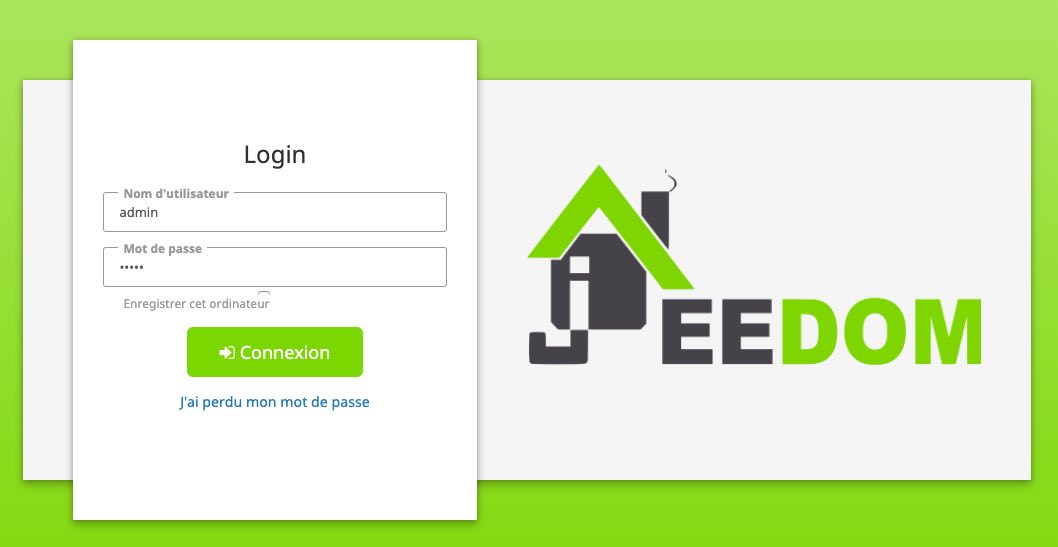
Once the installation is complete, you can log into Jeedom and enter the IP address previously configured from an internet browser.
Inclusion of Z-Wave +, EnOcean, RFXCom… modules
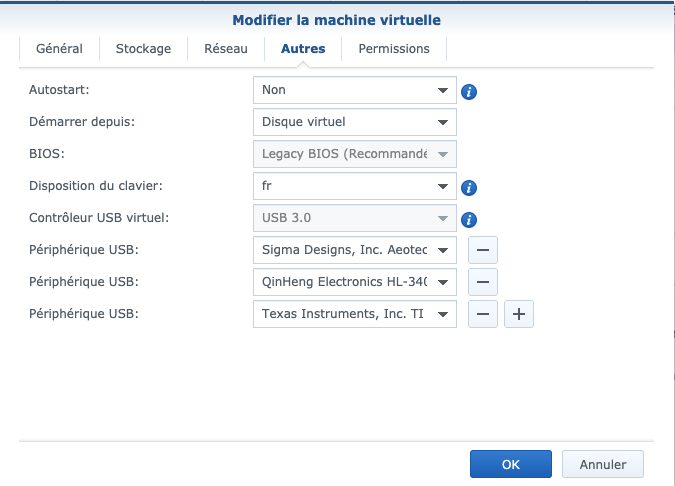
Before you can include health home automation modules, it is necessary to authorize the virtual machine to access the controllers smart health connected via USB. To do this, open Virtual Machine Manager, go to the tab Virtual machine. After having selected the VM Debian, click edit to open the configuration.
Go to the tab Other. To select the USB controller in front of USB device. Click on the + to connect another controller to the VM. Finish by clicking on okay. There is no need to restart the VM.
Go to the Jeedom interface and open the Z-Wave modules configuration panel. Open the selector Z-Wave key port and choose the port. It will be of the form / dev / ttyACMx.
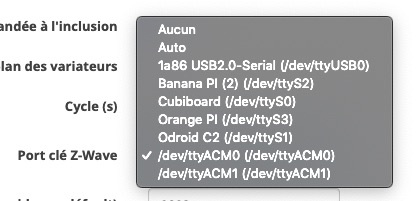
Save and restart the dependencies installation if necessary. Once the installation is complete, everything is ready.

Report on the operation of Jeedom on a virtual machine
Creating the virtual machine may seem long and tedious but as soon as you do it the first time, it’s really super simple. The huge advantage is to be on a perfectly standard Linux. So there will be absolutely no problem installing additional libraries. Most of the tutorials adapted to the Raspberry Pi are most often valid. Finally big advantage, we can schedule regular backups. A VM consumes (slightly) more resources from the NAS (<2%), especially RAM.
Small note in passing, unlike QNAP, USB controllers are not disconnected during backup on Synology NAS. No risk of losing control of your health home automation modules in your absence!
- Standard installation in a Linux environment
- All health home automation controllers (Z-Wave, Zigbee, RFLink …) are detected by the NAS and accessible directly on the virtual machine without the need to install drivers
- Automatic start of Jeedom with the NAS
- Programmable backup
- No disconnection of USB devices during backup (unlike QNAP)
- Quite long creation of the virtual machine
- Quite long installation of Jeedom
Which NAS model from Synology to choose?
Several consumer models may be suitable. Preferably choose a double-bay model allowing you to create a RAID 1 or Btrfs volume (more modern) in order to secure your data.
| Best choice | |||
|---|---|---|---|
| Model | DS218 + | DS718 + | DS918 + |
 |
 content / uploads / 2024/03 / nas-synology-ds718-plus-1030×1030.png 1030w, https://projetsdiy.fr/wp-content/uploads/2021/03/nas-synology-ds718-plus-788×788.png 788w, https://projetsdiy.fr/wp-content/uploads/2021/03/nas-synology-ds718-plus-800×800.png 800w, https://projetsdiy.fr/wp-content/uploads/2021/03 /nas-synology-ds718-plus-100×100.png 100w "sizes =" (max-width: 150px) 100vw, 150px” /> content / uploads / 2024/03 / nas-synology-ds718-plus-1030×1030.png 1030w, https://projetsdiy.fr/wp-content/uploads/2021/03/nas-synology-ds718-plus-788×788.png 788w, https://projetsdiy.fr/wp-content/uploads/2021/03/nas-synology-ds718-plus-800×800.png 800w, https://projetsdiy.fr/wp-content/uploads/2021/03 /nas-synology-ds718-plus-100×100.png 100w "sizes =" (max-width: 150px) 100vw, 150px” /> |
 |
|
| Average price of naked NAS ** | ~ 340 € | ~ 455 € | ~ 550 € |
| Processor | Intel Celeron J3355
Dual Core@2.0 GHz |
Intel Celeron J3455
Quad Core@2.3 GHz |
Intel Celeron J3455
Quad Core@2.3 GHz |
| CPU Benchmark Score | 1193 | 2126 | 2126 |
| RAM | 2 GB DDR3L | 2 GB DDR3L | 4 GB DDR3L |
| RAM max | 6 GB (2 GB + 4 GB)
possible 8GB |
6 GB (2 GB + 4 GB)
possible 8GB |
8 GB (2 x 4 GB) |
| Max VM number * | 2 | 2 | 4 |
| Max storage | 28 TB
2 x 14 TB |
28 TB
2 x 14 TB |
56 TB
4 x 14 TB |
| Transcoding *** | H.264 (AVC), H.265 (HEVC), MPEG-2 and VC-1; maximum resolution: 4K (4096 x 2160) @ 30fps | H.264 (AVC), H.265 (HEVC), MPEG-2 and VC-1; maximum resolution: 4K (4096 x 2160) @ 30fps | H.264 (AVC), H.265 (HEVC), MPEG-2 and VC-1; maximum resolution: 4K (4096 x 2160) @ 30fps |
| USB 2.0 | x2 | ||
| USB 3.0 | x1 | x3 | x2 |
| 1GbE Ethernet | x1 | x2 | x2 |
| eSATA | x1 | x1 | x1 |
| Noise | 19.3 dB (A) | 18.4 dB (A) | 19.8 dB (A) |
| Consumption. normal | 17.23W | 20.1 W | 28.8 W |
| Consumption. Standby | 5.4 W | 9.1 W | 12.6 W |
| Technical sheet | To consult | To consult | To consult |
|
Buy
|
Buy
|
Buy
|
(*) requires at least 4GB of RAM.
(**) The NAS is delivered without hard drive and memory extension.
(***) Reduces the storage space (and therefore the overall cost of the NAS) for ehealth surveillance
- Install Jeedom on NAS Synology DS718 + on a Debian Stretch virtual machine
- Install Domoticz on NAS Synology DS718 + under Docker or virtual machine
- Install the MQTT Mosquitto broker on NAS Synology (DSM 6.2+) with Docker
- #Review of the QNAP TS-251A NAS. 8GB RAM extension. CPU benchmark with a Jeedom VM
- Install Jeedom on a QNAP NAS. Virtual machine or Docker (v3 script
)
Discover more Smart health DIY projects with AB SMART HEALTH


